What’s up Guys! Welcome to automationcalling.com
In the traditional development cycle, there were situations that we had been following Waterfall where QA had to wait for a development build to deploy on QA and Stage environment. When the development team was working for new features, hotfixes or bug fixes whereas QA was working on understanding requirements and test case preparation only, QA team had no clue how the application looks and all they came to know during testing phases and come up with surprise the application is not working as expected but it supposed to be working as per requirement. This cycle is repeated again meaning go back to development comes back with all manual process.
Here are some disadvantages and time consuming or Manual Process in the development cycle.
- Build and Deployment process is Manual.
- Configuration issues chances are high.
- QAs to wait for build in the testing phase.
- No Collaboration among a team, Teamwork as a silo.
- Build often get failed which impact the deadline.
- QAs are not able to verify bug fixes or issues quickly.
- QAs to wait for development dependency to deploy on multiple environments.
- Configuration Management and Version control System maintenance is high
- Test Execution was not automated, so no early feedback
- No proper Unit test and it was all control with development.
To address all this issue and make collaboration with the team, come up with a process called DevOps
What is DevOps?
The terminology Dev refers to “Development” and Ops refers “Operation”. DevOps is a not a framework or process, it’s a culture to collaborate, communicate and integration between Development and Operations Team.
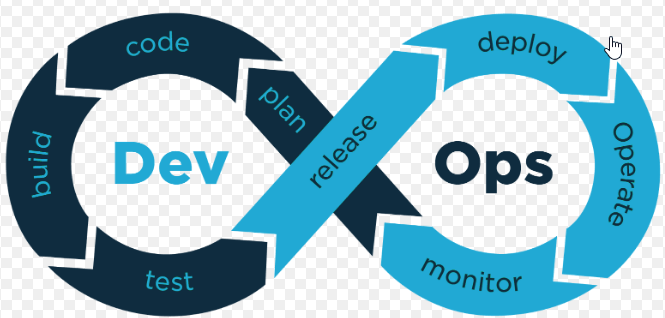
How DevOps Work?
- Tools that allows to monitor and measure the test code to build and deploy continuously for eg., tools like Jenkins, Bamboo and Travis etc.,
- Tools that help Source Control allows the team to manage, track and document to the application code and configuration management. For eg., Tools like GitHub, Bitbucket, SVN etc.,
- Tools that help to run the Unit test to validate your code.
- Tool that helps to run Test Automation like Functional and Performance test to validate development code
- Tool that helps to take build from development and deploy to multiple environments like QA, Stage, and production.
- Tool that helps to maintain configuration management code that allows the team to deploy new code in production, also this helps to maintain Source control management and versioning system in production for multiple customers.
WHO ARE CORE MEMBERS OF DevOps TEAM?
- Development Team
- Developers who work for new features of upcoming releases, bug fixes, hotfixes or patch like entire development activity from Coding, Unit Test. Responsibility must be implementing Unit test part of Continuous Integration for their developed code and work with DevOps Team for property or configuration changes
- Should create unit test Jobs in CI tools.
- Quality Assurance:
- Must focus and develop test automation in all areas irrespective of any devices. Should give mostly priority on Rest API test automation suites followed by UI. Must also integrate Performance Test and Security Test in CI
- Should create functional, performance and security jobs in CI Tools.
- Operations:
- Release, Deploy and Monitor using tools like Chef, Puppet, Ansible, ELK etc in Production
- Automate the process to deliver code in cloud environments for eg., AWS, Azure or a server.
- Mostly responsibility of Production Support/System Admin
- Continuous Deployment describes software is deployed quickly in a production environment with complete automation process in the development life cycle.
How DevOps Starts from Scratch?
DevOps can be implemented in the following ways:
- Automate Build and development process in in-house:
- Use SCM management either in GitHub, Bitbucket or SVN etc.,
- Make sure to implement Unit test that should interact with the database not a mockup. Can use a library like JUnit, NUnit, PHP Unit etc.,
- Implement Test Automation for Rest API, UI Layer, Security and Performance work on a strategy on quicker feedback. Can use tools like Selenium, Ready API, JMeter, Load Runner etc.,
- Implement unit level code coverage, code quality tools for eg., SonarCube.
- Make sure new code in testable in all ways from Development to Testing side.
- Continuous Integration:
Once all are done in the above section, it’s time to bring up Jenkins/Bamboo/Travis tool in place.
- Jenkins will allow adding multiple jobs for each activity and track on a daily basis how our newly developed and maintenance code works with integrating all in one place
- Jenkins allows us to install multiple plugins where we can incorporate Unit, Functional, Performance test results and plan our build and test schedule with more collaboration
- Possibilities of identifying early bugs in each iteration and integrate creating bugs in management tools like JIRA ,
- Continuous Delivery/Deployment
- This is the place where we get the real value of our business regarding how our code perform in the production
- All new and maintenance code is deployed and monitored
- Brings time to market, software is deployed quickly to production with the help of complete automation of the development life cycle.
Benefits of Devops:
- Time to Market
- Early or Quick feedback
- Defect prevention or fewer bugs
- No or very few configuration issues
- Less Maintenance and lower cost to delivery.
- No Manual intervention, a possibility of automating from Development to Deployment
So far, we have seen what is DevOps? And how exactly it is useful to implement in companies in order to achieve time to market for software products, moving forward, we are going to take a look on Continuous integration part especially on Test Automation side in Jenkins.
In this section we are going to take a look on:
- What is Jenkins?
- How to Install Jenkins in Windows?
- Configuration in Jenkins
- How to Create a Job in Jenkins?
- How to Kick Start Cross Browser Parallel with Lambda using Jenkins?
- How to create a simple pipeline only rely on Test Automation Side in Jenkins.
What is Jenkins?
Continuous Integration and Continuous development is an important part of DevOps, in fact it comes under umbrella of Devops, which required the tools to integrate development, testing, and operation work.
Jenkins is one of the very popular tool in the market which actually helps to achieve CI/CD process.
Jenkins is a continuous integration/continuous deployment tools which are written in Java and come up with 1400+ plugins. It’s allowed us to build and test your software project continuously this would make easier for developers, testers and it’s easy for the users to obtain a fresh build.
The power of Jenkins is to achieve continuous integration/continuous deployment with the help of its plugin. For eg.,
- GIT: Maintain Version Control System
- Maven: Build and dependency management
- Configuration Management: Tools like Puppet
- Continuous Monitoring: Tools like Nagios
Continuous Testing: Can integrate Test automation tools like Selenium, Protractor, UFT etc., and execute with the help of Build Management tools like Maven, Gradle or Package Manager etc.,
- Continuous Deployment: Ansible
Advantages of Jenkins:
- It’s an Open Source tool with awesome community support
- It’s easy to install and maintain
- It’s built-in Java so can be portable to many platforms
- 1400+ plugins in Jenkins can be leveraged
- Provides pipeline functionality which helps CI for software development life cycle
- Automate complete development life cycle
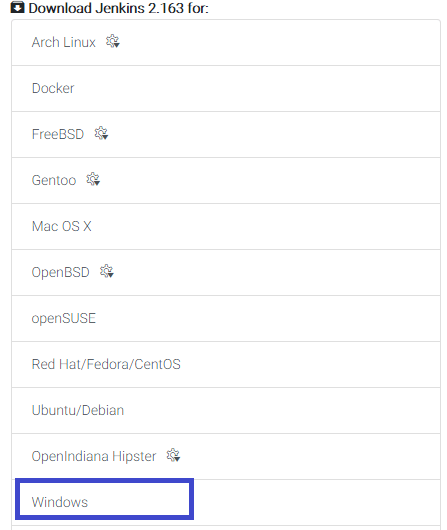
How to Install Jenkins on Windows
To download Jenkins for windows, click here. Jenkins produces two ways of release lines.
- LTS (Long-term Support)
- LTS releases are chosen every 12 weeks once from the stream of regular releases as the stable releases for the time
- Weekly
- A new release is produced weekly to deliver bug fixes and features to users and plugin developers.
It’s all depends on your organization needs. I would prefer LTS
In this example, I’m going to show how to install on windows, so I chose “Windows” installer.
After download, extract the installer.
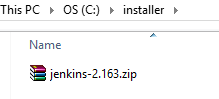
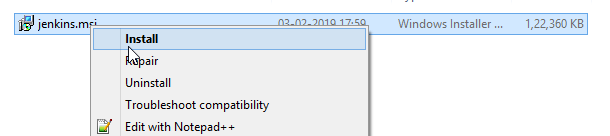
Once extracted the zip file, right click on “Jenkins.msi” and install as administrator
Here is the complete setup back to back snapshot from installation start to finish installation of Jenkins Part.


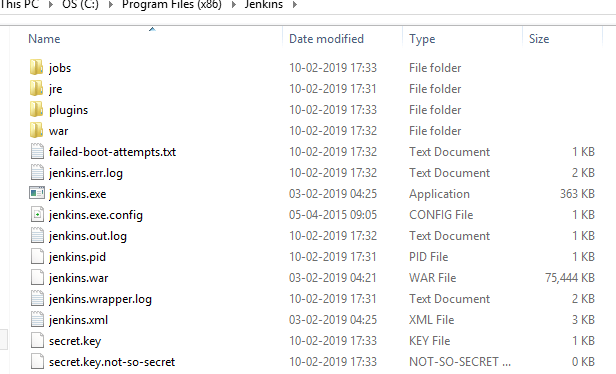
Once installation is finished, go to program files(x86) folder and verify jenkins.war file and necessary files are installed as below snapshot.
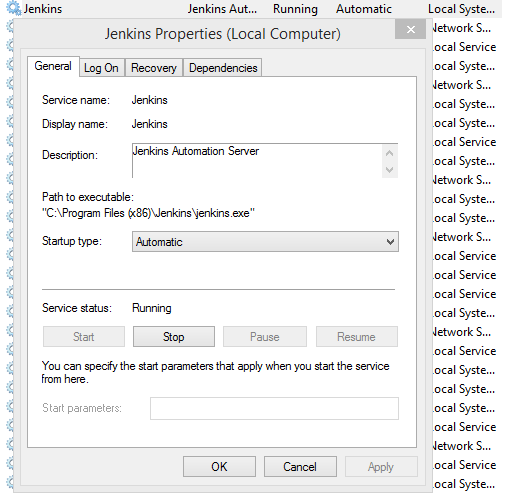
There are two ways you can start Jenkins in Window
- Started as windows as Service as below snapshot.
- Started in command prompt as below

- To interact with machines or especially in test automation side like browser launch etc., this option is preferred
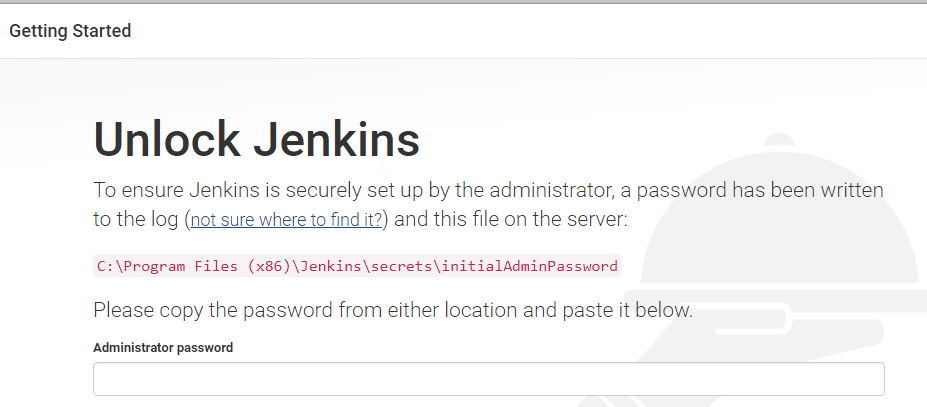
Once Jenkins server is started, it prompts you to type the default password which is located as mentioned in the below snapshot
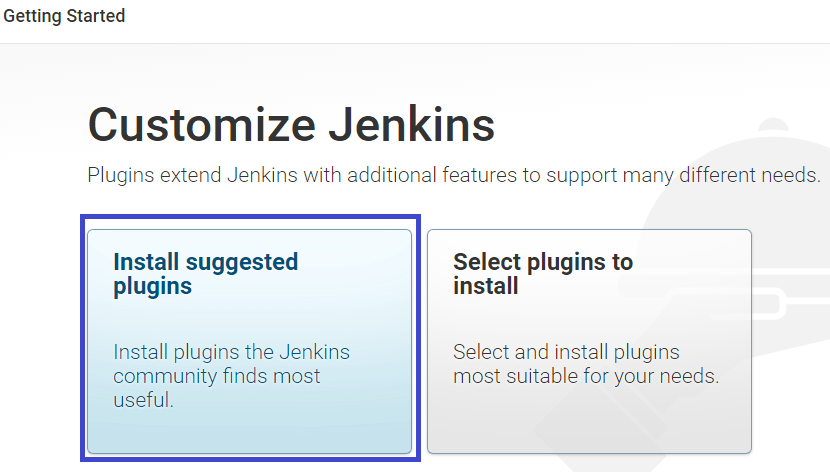
After supplied default password, click on next, select “Install Suggested Plugins” and click next
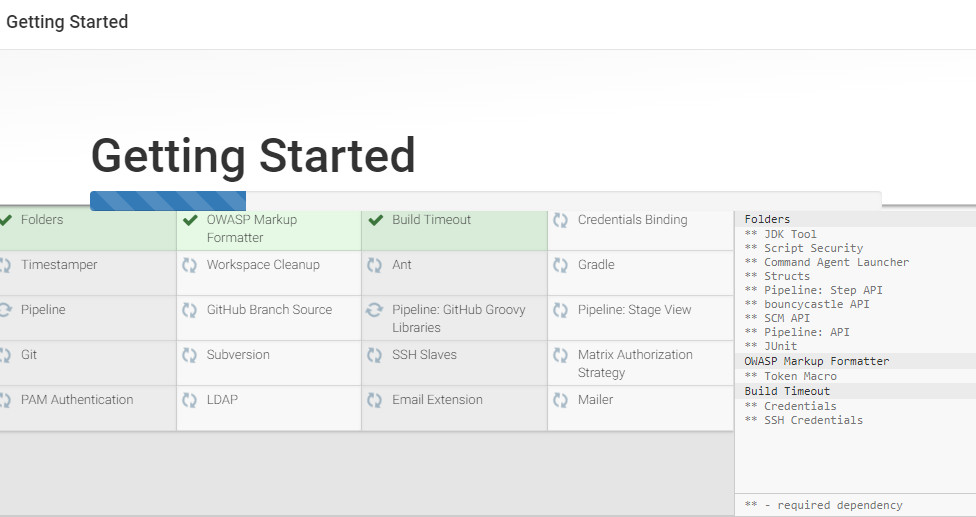
For installing the plugins take while, wait for some time as you see in the below snapshot.
After completed plugins installation, it takes you to add your own username and password instead of default password. Click Next button.
Note: Jenkins Plugins allow you to setup LDAP user account for your organization users, which will help us to login in secure and access only for organization employees.

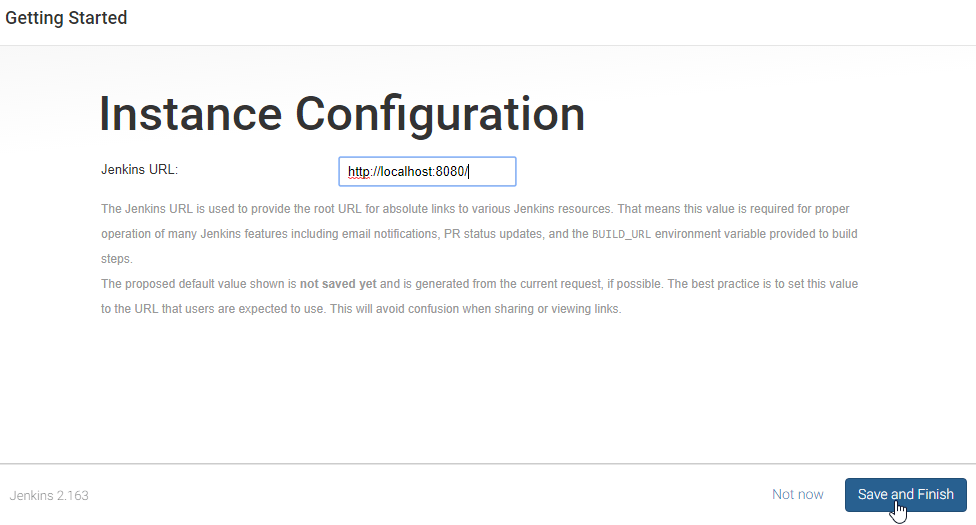
Configure URL how it needs to be configured. For this example, I keep it as localhost
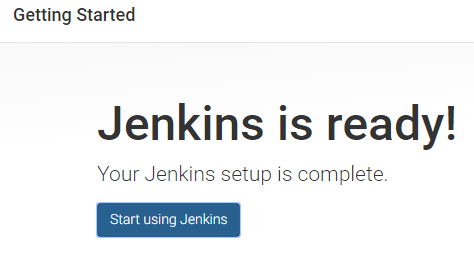
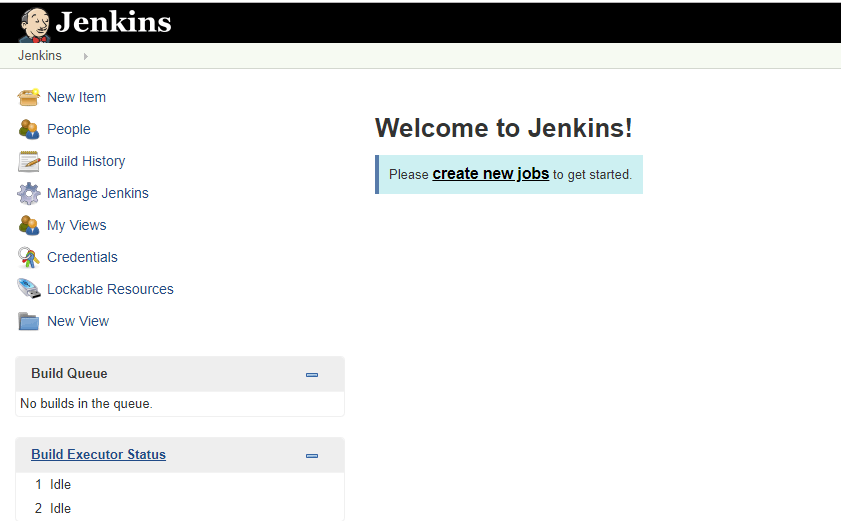
Kudos! To you guys! Jenkins has been setup successfully.
It’s important to let Jenkins know where our installer has been installed. Here are the tools need to be configured in Jenkins:
- Git Client Installer Location (or) Let Jenkins Install this installer in online
- JDK Installer location (or) Let Jenkins Install this installer in online
- Maven Location (or) Let Jenkins install this installer in online
- Add Necessary credentials in Jenkins for eg., fetching repository for Bitbucket or GitHub from Cloud, we should authenticate the credentials where we can add/store in Jenkins server. So it will be easy to fetch while trigging job.
Configuration in Jenkins:
- Go to Manage Jenkins link at the left pane
- Click on Global tool Configuration

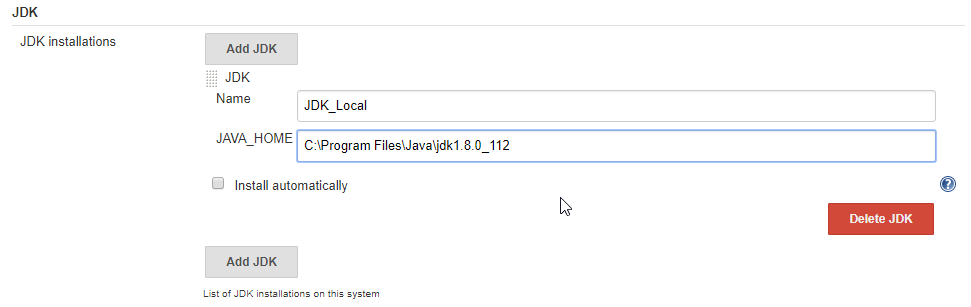
Expand JDK Section and configure where JDK is installed, otherwise select check box install automatically
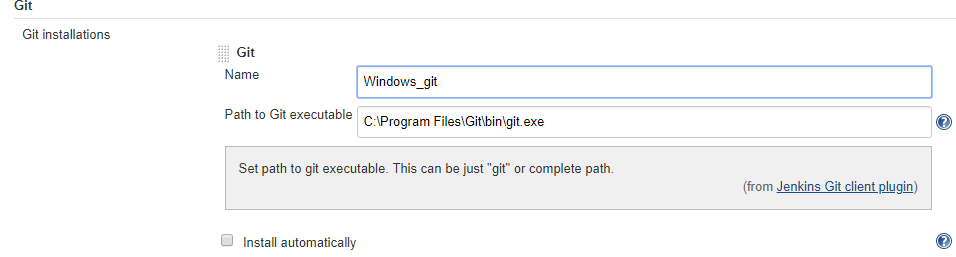
Here is the screenshot of how to configure Git client (or) leave let Jenkins install by default by checking “Install automatically”
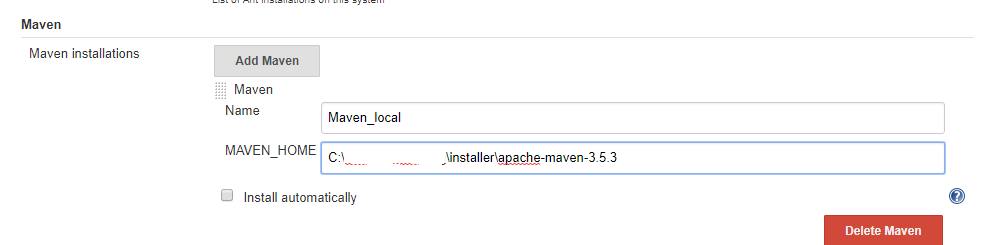
Here is the screenshot of how to configure Maven if you installed in local (or) leave let Jenkins install by default by checking “Install automatically”
The next configuration part is credential which is an important thing to store in one place. Jenkins allows us to create multiple credentials for different integration system for eg.,
- To maintain different login access for Jenkins
- To add third-party credentials like bitbucket or GitHub
- To store LambdaTest credentials so that automation kickstart in a cloud environment
To Add Credentials:
- Click on “Credentials” at the left pane
Add Credentials as mentioned in the below snapshot
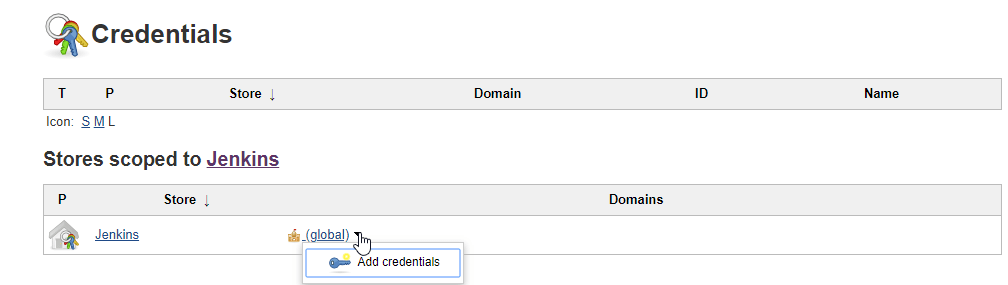
- Create third-party credentials account for eg., I use my bitbucket account

How to Create a Job?
- In Jenkins Dashboard, click on “New Item” button

- Click “Source Code Management” tab
- In this example, I use bitbucket account but feel free to use GitHub or source control management.
- Pre-requisites:
Your project must be exported to Bitbucket account - In Credential page, make sure you configure bitbucket account
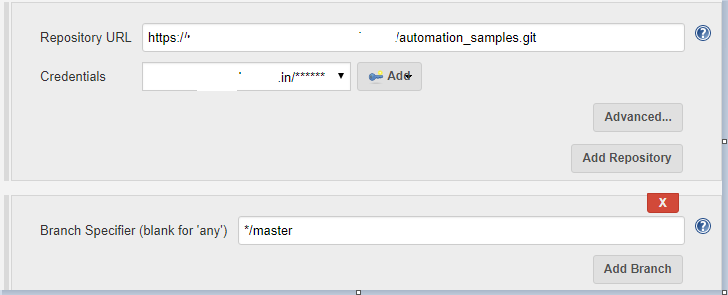
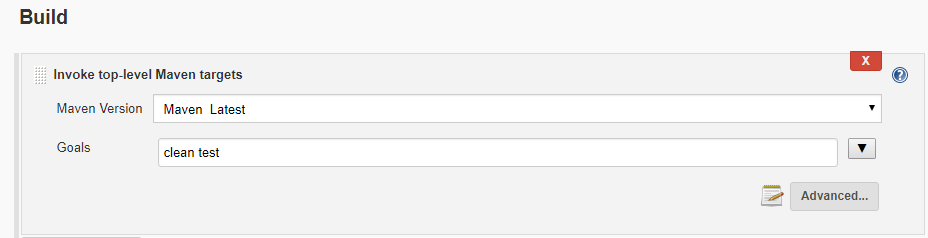
- Make sure to add Maven Goals to kick off your automation test.
How to Kick Start Cross Browser Parallel with Lambda using Jenkins?
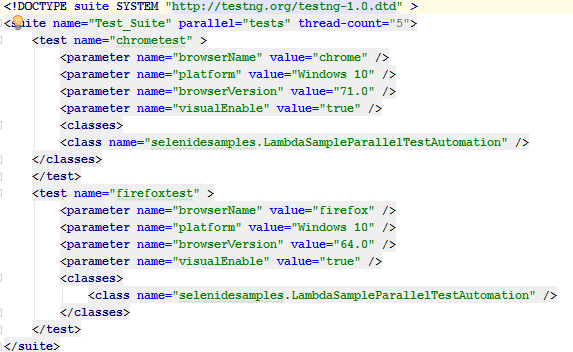
- Configure parallel thread option in TestNG
- Create a base class to handle all configuration or initialization setup for eg., BeforeClass or BeforeSuite etc.,
- Make sure you Lambda Username and Password in System environment variabl
Click on Build
![]()
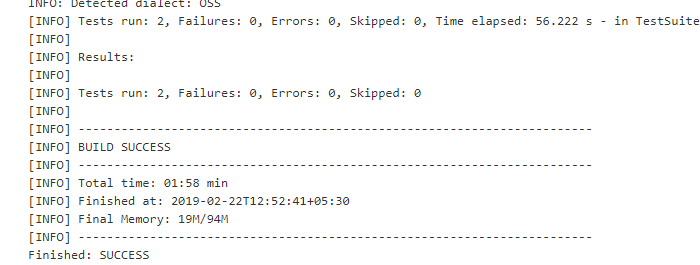
Once the test is done, you will see the status of the job like below
![]()
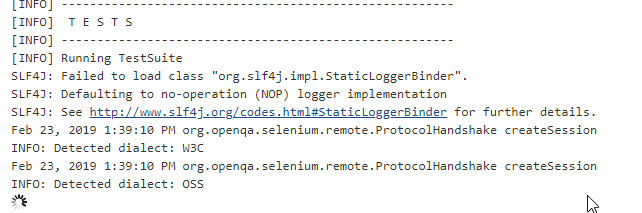
Go to Console page in a specific build and see the test gets passed.
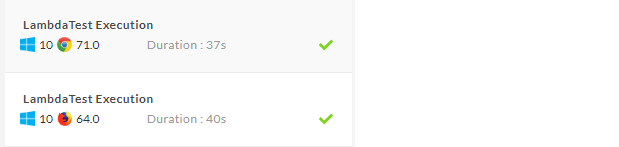
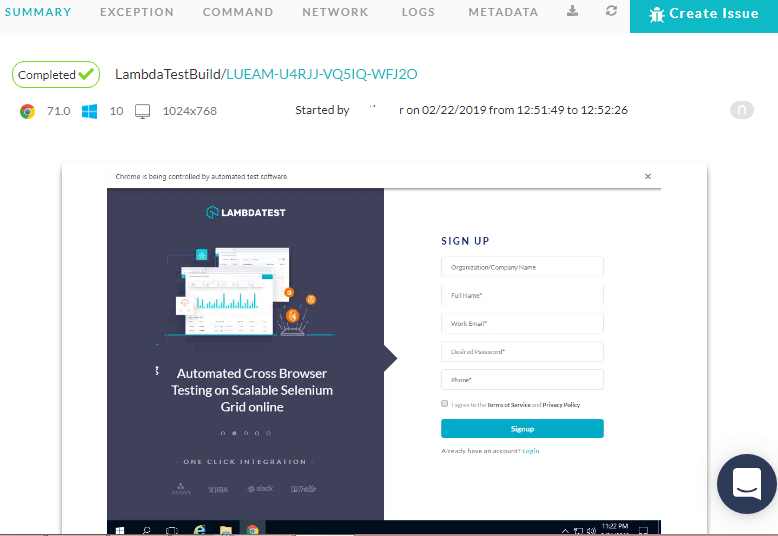
To verify the results in Cloud, Login to LambdaTest and Navigate to Automation Tab
So far we have seen how to run automation in Jenkins job by configuring necessary dependencies. We are going to take a look at how to create a pipeline in Jenkins job and see how one job interacts with another job without manual intervention.
What is Jenkins Pipeline?
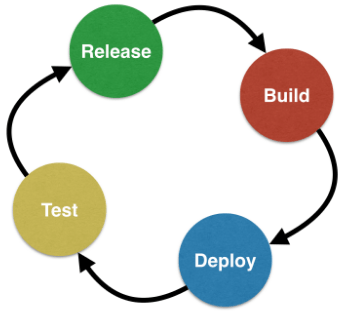
To explain in simple words, it’s a workflow contains multiple perform one after another in a sequential manner. Jenkins pipeline is a combination of the complete development life cycle which includes Build, Deploy, Test and Release activities. Jenkins has multiple plugins which actually support and integrate third-party tools/libraries that help to create the job for development, QA, release, and monitoring activity.
In this article, I’m going to explain how to create a simple pipeline in Jenkins using automation jobs without coding/Jenkins file. Before creating a pipeline, I would suggest you create more than 1 job in Jenkins and also make sure child job is dependent on parent job. The below steps will explain to you in detail how to do that.
- Go to your child job and click on the ‘Configure’ link
- Click on Build Trigger tab
- Select checkbox “Build after other projects are built” in configured Jenkins job
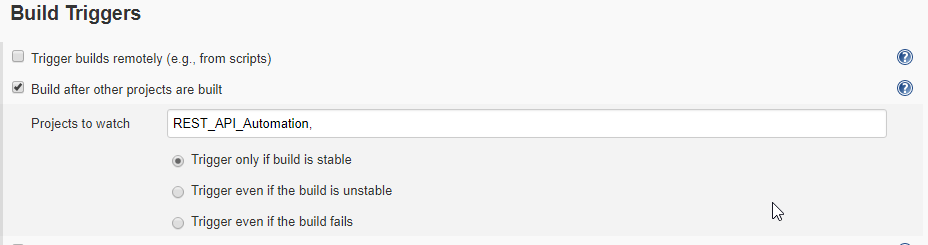
- Click Save button
Why Jenkins Pipeline is necessary?
- To automate the software development process
- Helps Multiple users like developers, QA or IT team to edit and execute the job
- For best Practice, Jenkins Pipeline must be implemented in code so that other developers can easily edit and enhance the code for better readability and maintenance.
- Jenkins Pipeline helps to support big projects to maintain independent jobs like WebService, UI or Microservices deployment for multiple servers and kick off automation suites etc.,
To Create jobs in Jenkins, at first we must install a plugin called “Pipeline Plugin”
- Click on Manage Jenkins link at the left pane
- Click on Manage Plugins link
- Click on Available tab
- Search “Build Pipeline”

- Click on “Install without Restart” this is to avoid your Jenkins restart after installing the plugin.
- Click on “+” Icon next to All tab
- Select “Pipeline” and add job name as mention in the below image.
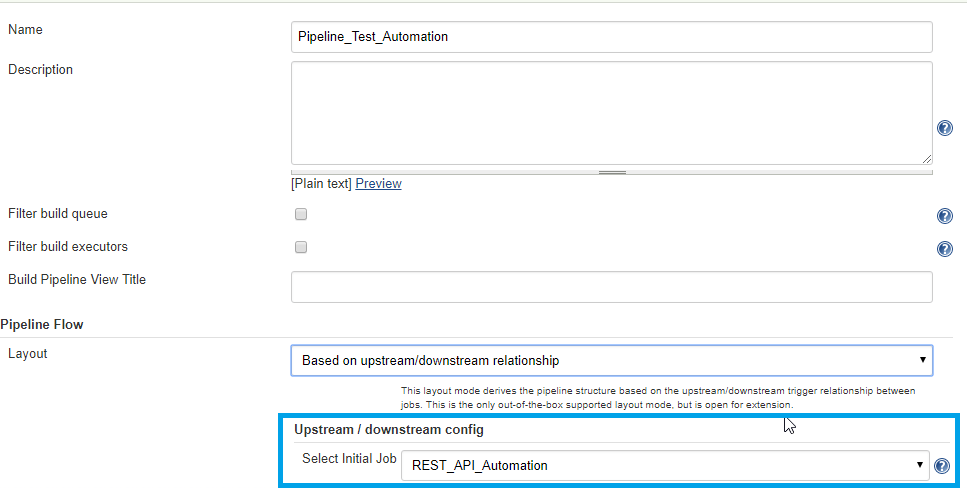
- Click the Save button.
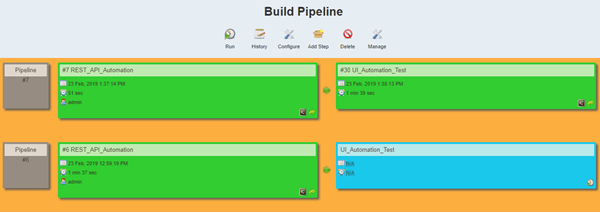
- Parent and its downstream job get loaded as you see in the below snapshot.

- Click on “Run” button
- It will trigger complete workflow starting REST API to UI Automation.
- Pipeline Project current running status
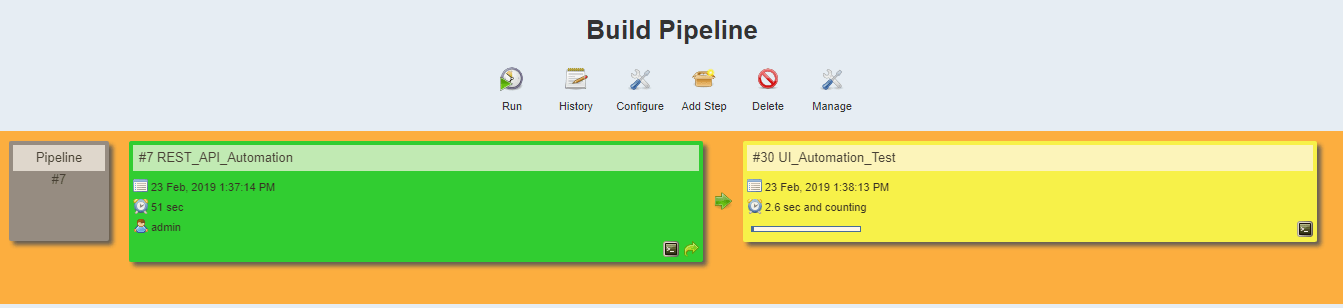
- Click on Icon at bottom right pane to track console
- Finally test runs successfully and sees the latest results at top of the page
With this article, we learned how to set up Jenkins from scratch, create a job and run in a pipeline project. Thanks for your time and please provide your feedback.
Please scribe my blog for more updates!

Leave a comment